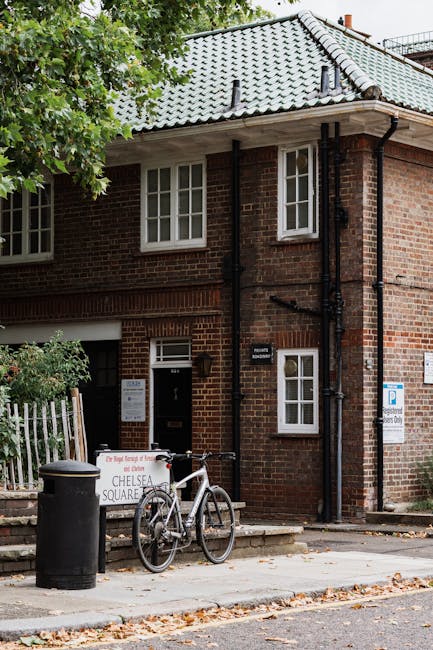
SW3 End of Tenancy Cleaning Checklist for Landlords
If you are a landlord in SW3, the final clean at the end of a tenancy can make the difference between a smooth re-let and a frustrating delay. A proper SW3 end of tenancy cleaning checklist for landlords helps you inspect the property fairly, spot missed areas, and decide what needs attention before the next tenant moves in. It is not just about looking tidy. It is about presenting the home in a condition that matches reasonable expectations, while keeping records straight and avoiding last-minute disputes. To be fair, the last hour before checkout can feel a bit chaotic. This guide keeps it simple, practical, and landlord-focused.
Below you will find a full checklist, step-by-step guidance, common mistakes, a comparison of cleaning approaches, and a realistic example from a typical SW3 rental. If you want a broader overview of professional standards, the principles behind end of tenancy cleaning and deep cleaning are worth keeping in mind as you plan the handover.
Expert summary: A landlord checklist works best when it is used before checkout, during inspection, and again after the property is cleaned. The goal is not perfection for its own sake; it is consistency, evidence, and a cleaner re-letting process.
Table of Contents
- Why this checklist matters
- How the process works
- Key benefits and practical advantages
- Who needs this and when it makes sense
- Step-by-step guidance
- Expert tips for better results
- Common mistakes to avoid
- Tools, resources and recommendations
- Law, compliance, standards and best practice
- Options, methods and comparison table
- Case study or real-world example
- Practical checklist
- Conclusion
- Frequently asked questions
Why SW3 End of Tenancy Cleaning Checklist for Landlords Matters
In SW3, rental properties often sit in a higher-expectation market. Tenants may have lived there for years, furnishings may be premium, and small marks stand out more than they would in a plain student flat. That means end of tenancy cleaning is rarely just a quick once-over. A landlord needs a clear system for checking kitchens, bathrooms, floors, appliances, windows, and overlooked corners like skirting boards or extractor covers.
Why does this matter so much? Because a vague inspection leads to vague arguments. One person thinks the place looks "fine"; another notices greasy cupboard tops, limescale in the shower, or dust on light fittings. A proper checklist gives you a shared standard. It also makes it easier to brief cleaners, compare the outgoing condition against the inventory, and avoid paying twice for the same issue.
There is also the matter of timing. In busy parts of Chelsea, viewings and move-ins can follow one another very quickly. If the property is not prepared properly, you lose momentum. A missed oven clean today can become a delayed check-in tomorrow. And nobody enjoys explaining that to a new tenant while standing in a hallway that still smells faintly of bleach and old cooking grease.
The checklist also protects your relationships. Good landlords do not need to micromanage every cloth wipe. But they do need a repeatable process. That is the real value here: less guesswork, fewer disputes, and a cleaner handover.
How SW3 End of Tenancy Cleaning Checklist for Landlords Works
The checklist works by dividing the property into zones and checking each one against a consistent standard. You are not trying to judge whether the flat feels "nice." You are checking whether it is ready for marketing, occupation, and a fair final inspection. That shift sounds small, but it changes everything.
Most landlords use the process in three stages:
- Pre-clean assessment: walk through the property and identify what needs specialist work, such as oven cleaning, carpet cleaning, or window cleaning.
- Cleaning and correction: carry out or arrange the clean, focusing on hygiene, visible presentation, and any problem areas left by the tenant.
- Final inspection: compare the cleaned state with the inventory and photographs, then note any remaining issues that are not cleaning-related, such as damage or missing items.
This approach works because it separates cleaning from wear and tear. A little scuff on a wall is different from a dirty hob. A tired carpet is different from a stained carpet. That distinction matters when you decide what to fix, what to accept, and what to document.
Truth be told, many landlords do a better job once they stop treating the end of tenancy clean as a single event. It is really a sequence. The more methodical you are, the less likely you are to discover a surprise five minutes before the keys are handed over.
Key Benefits and Practical Advantages
A solid landlord checklist is more than a tidy admin tool. It has direct practical value.
- Fewer disputes: clear standards reduce arguments over whether the property was properly cleaned.
- Better turnover: a clean, ready home can be re-marketed faster.
- Stronger inventory evidence: you can compare before-and-after condition with more confidence.
- Lower stress: everyone knows what "done" looks like.
- Better first impression: new tenants notice smell, shine, and order within seconds.
- More efficient contractor briefings: you can tell cleaners exactly what matters most.
There is a subtle but important benefit too: a checklist stops you wasting money on unnecessary re-cleans. If the main issue is one greasy oven and a few dusty blinds, you do not need to treat the whole flat like a post-renovation project. On the other hand, if the property has seen heavy use, the checklist tells you where to focus first.
For some landlords, the practical win is emotional as much as financial. There is a particular relief in opening the door and seeing the place look calm, fresh, and ready. Not perfect. Just properly handled. That kind of order makes the next step much easier.
Who This Is For and When It Makes Sense
This checklist is for landlords, letting agents, and property managers handling rentals in SW3. It is especially useful if you manage:
- long-let flats between tenancies
- furnished or part-furnished properties
- high-spec homes where presentation matters
- properties with carpets, upholstery, or delicate finishes
- period homes with detailed surfaces, mouldings, or sash windows
It also makes sense if you are comparing a tenant's checkout condition against a deposit return discussion. A landlord who has clear notes, dated photos, and a structured inspection will always be in a better position than someone relying on memory. And memory, let's face it, is not a reliable cleaning record.
This is particularly helpful when a tenant has done some cleaning themselves but not to a professional standard. You may see a shiny kitchen at first glance, then notice the extractor fan is still coated with dust or the bathroom silicone has grime build-up. That is the sort of detail the checklist catches.
If the property is empty already, you may also decide that a one-off cleaning visit is more sensible than piecing together separate jobs. If it still has stubborn wear, a broader house cleaning approach can make more sense than a quick surface clean.
Step-by-Step Guidance
Here is a practical way to use the checklist without turning it into a paperwork headache.
1. Start with the inventory and photos
Before anyone cleans a thing, compare the property against the inventory report, move-in photos, and any tenant communications. You are looking for cleaning issues, damage, missing items, and areas that need specialist attention. Keep this simple. A phone, a notebook, and a few decent photos are often enough.
2. Do a room-by-room walkthrough
Walk through the property slowly and note what you can see, smell, and touch. Yes, smell matters. A room can look tidy and still hold stale cooking odours, pet scent, or dampness. Pay attention to:
- kitchens
- bathrooms
- bedrooms
- living areas
- hallways and stairs
- balconies or exterior access points where relevant
3. Prioritise high-impact areas first
Start with what tenants and prospective viewers notice immediately: floors, sinks, hobs, ovens, windows, and bathroom fixtures. A spotless skirting board is nice. A clean oven is much more noticeable. If time is tight, focus on the items that most affect presentation and hygiene.
4. Break the clean into tasks
Instead of asking for a "full clean," list the actual tasks. For example:
- degrease hob, extractor, and splashback
- clean inside and outside of cupboards
- descale taps and shower screens
- wipe light switches and door handles
- vacuum and edge-clean carpets
- clean inside windows and frames
This makes it easier to brief cleaners, and easier to check the work afterwards. The wording should be plain English, not inspection jargon that nobody uses in real life.
5. Check specialist items separately
Some jobs are best treated as their own category. Ovens, carpets, upholstery, and hard floors often need dedicated attention. If the property includes fabric sofas, armchairs, or mattresses, you may want to consider upholstery cleaning or sofa cleaning. If the flooring is a mix of wood, tile, or laminate, a proper hard floor cleaning check can save you from dull patches and residue.
6. Confirm the clean with a final inspection
Once the property has been cleaned, repeat the walkthrough. Check under beds, behind doors, on top of cabinets, inside drawers, and along windowsills. Those are the areas that get missed most often. You will be surprised how often a perfectly polished kitchen still has crumbs behind the fridge. Human nature, honestly.
Expert Tips for Better Results
After enough end of tenancy cleans, a few habits stand out.
- Use lighting properly: daylight exposes dust and streaks better than overhead bulbs. Check the property by a window if possible.
- Inspect from a tenant's eye level: people notice smudges on switches, handles, mirrors, and splashbacks long before they look at ceiling corners.
- Do not ignore odour: cooking, pets, smoking, and damp can all linger even when surfaces look fine.
- Separate dirt from damage: a burnt mark on a tray or a cracked tile is not a cleaning issue.
- Photograph everything: before, during, and after. Boring? A little. Useful? Absolutely.
- Ask for the final clean before viewings: if possible, keep a small gap between cleaning and the first round of marketing photos.
A small practical tip from experience: make sure your checklist includes the places people almost never mention out loud, like tops of wardrobes, behind radiators, and inside bin cupboards. Those small forgotten zones can make a property feel half-finished even when the visible spaces look good.
If you use a professional team, it helps to brief them clearly and choose a company you can trust with access and security. Pages like insurance and safety, health and safety policy, and terms and conditions are useful indicators of how a provider works and what standards they follow.
Common Mistakes to Avoid
Most end of tenancy problems are not dramatic. They are ordinary little oversights that stack up.
- Assuming "clean enough" is enough: a quick wipe rarely meets the standard needed for re-letting.
- Forgetting hidden grease and dust: extractor fans, top shelves, and behind appliances are common trouble spots.
- Not matching the inventory: if you do not check against the original record, you may miss whether something was already damaged.
- Leaving specialist jobs too late: ovens and carpets often need extra time and separate equipment.
- Using vague instructions: "clean kitchen" is too broad; "clean inside cupboards and degrease hob" is much better.
- Ignoring exterior glass and frames: windows can make a flat feel neglected if they are streaked or dusty.
Another common issue is trying to do everything in one rush at the end of the tenancy. That tends to create a messy middle ground: the property is technically cleaned, but not really ready. Better to plan it properly, even if that means splitting tasks across two visits.
And here is a small but real one: people often forget the smell of a place after cleaning products have faded. If the flat still smells stale the next morning, there is usually another issue hiding somewhere. Maybe the bin area. Maybe a damp patch. Maybe the oven door seal. Worth checking.
Tools, Resources and Recommendations
You do not need a trolley full of specialist gear to manage a landlord clean, but a few tools make life easier.
- microfibre cloths
- non-scratch sponges
- vacuum with attachments
- mop and bucket suitable for the flooring type
- glass cleaner or streak-free surface cleaner
- descaler for bathrooms and taps
- degreaser for kitchen areas
- bin bags and disposal supplies
- flashlight for corners, under units, and behind appliances
If you are briefing a cleaner, it helps to group tasks by room. That keeps the handover efficient and reduces the risk of one area being polished while another is missed. A cleaning team that understands the sequence will usually work faster and with fewer callbacks. If you are considering a broader clean across the home, domestic cleaning may be useful for occupied properties, while a professional cleaning company can handle larger or more complex turnovers.
For landlords managing several properties, it is also worth keeping a standard checklist document you can reuse. Not fancy. Just a clear file with your usual rooms, risk areas, and note fields. The boring bits are often the ones that save the most time.
Law, Compliance, Standards and Best Practice
Landlords in the UK should be careful not to mix up cleaning standards, legal obligations, and tenancy disputes. A good clean is important, but it does not magically turn ordinary wear and tear into tenant fault. In practice, the safest approach is to document condition fairly, act consistently, and keep the cleaning standard aligned with the property's original inventory and tenancy terms.
Best practice usually means:
- using a clear inventory and checkout record
- distinguishing cleaning issues from damage or wear
- keeping dated photographs
- following the tenancy agreement and any agreed cleaning expectations
- using reasonable, proportionate standards rather than unrealistic perfection
If you use contractors or cleaners, it is sensible to confirm access arrangements, safety expectations, and what happens if the property needs extra work. Pages such as payment and security and recycling and sustainability can also matter if you want the process to be tidy operationally as well as visually.
Where compliance is concerned, the most defensible position is usually the simplest one: write everything down, stay fair, and avoid making assumptions. If an issue is unclear, treat it carefully and record why you made the decision you did. That habit helps more than people think.
Options, Methods, or Comparison Table
Landlords generally choose one of three approaches: do it themselves, hire a general cleaner, or book a specialist end of tenancy clean. Each has strengths, and each has a catch or two.
| Approach | Best for | Pros | Watch-outs |
|---|---|---|---|
| DIY landlord clean | Small, lightly used properties | Lower direct cost, full control | Time-consuming, easy to miss details, uneven finish |
| General cleaner | Routine refreshes and lighter turnovers | Flexible, familiar, often affordable | May not include specialist tasks like ovens or carpets |
| End of tenancy specialist clean | Most checkout turnovers, furnished homes, busy lettings | More systematic, better for hard-to-reach areas, usually more consistent | Requires clear scope and proper briefing |
If the property needs carpet attention, think separately about carpet cleaning rather than assuming a vacuum is enough. If windows are a visibility issue, window cleaning can dramatically improve the overall feel of the space. A lot of landlords end up using a mixed approach, and that is perfectly sensible.
In a practical sense, the best option is the one that matches the property's condition, timeline, and risk level. A one-bed flat in tidy condition? A standard clean may be enough. A furnished maisonette with oven residue, stained grout, and a tired carpet? Specialist attention is the smarter call.
Case Study or Real-World Example
Picture a SW3 two-bedroom flat after a three-year tenancy. The tenants have done a decent job. Surfaces are mostly clear, but the kitchen has built-up grease around the hob, the bathroom mirror has spotting, and the lounge carpet shows traffic marks near the sofa. Nothing shocking. Nothing dramatic. Just the usual wear of real life.
A landlord using a checklist would likely note the following before ordering cleaning:
- oven and hob need professional attention
- cupboards need internal wipe-down
- bathroom needs descaling and mirror polish
- carpet needs deep attention in walkway areas
- windows need streak-free cleaning for viewings
After that, the property is cleaned in layers rather than all at once. The kitchen is tackled first because that is where grease lingers. The bathroom comes next because limescale is visible and unforgiving. The carpet is handled separately. Finally, the landlord checks the rooms in daylight, notices one missed skirting board behind the radiator, and gets it corrected before photography.
The result? The flat feels lighter, smells cleaner, and photographs better. More importantly, the landlord has notes showing what was cleaned and what remained a maintenance issue rather than a cleaning one. Simple enough, really. But those simple steps are often the difference between smooth and stressful.
Practical Checklist
Use this as a working landlord checklist for SW3 end of tenancy cleaning.
General areas
- Remove rubbish and left items
- Dust all reachable surfaces
- Wipe skirting boards, doors, and handles
- Clean light switches and plug sockets externally
- Vacuum and mop floors appropriately
- Check under furniture, behind doors, and in corners
Kitchen
- Clean inside and outside cupboards
- Degrease hob, extractor, and splashback
- Clean oven interior, trays, racks, and door
- Wipe fridge/freezer if included in tenancy
- Clean sink, taps, and draining area
- Remove limescale and food residue
Bathroom
- Descale taps, shower screen, and tiles
- Clean toilet inside and out
- Polish mirrors and glass
- Remove soap residue from fittings
- Check sealant and grout for visible grime
Bedrooms and living spaces
- Dust shelves, radiators, and windowsills
- Vacuum carpets carefully, including edges
- Spot-clean marks on walls if appropriate
- Clean wardrobes and drawers inside if supplied
Windows and finishes
- Clean glass, frames, and accessible tracks
- Wipe ledges and sills
- Check for streaks in daylight
Specialist extras
- Arrange oven cleaning if heavy buildup remains
- Book carpet treatment where traffic marks or staining are visible
- Consider upholstery or sofa cleaning for furnished lets
If you want a professional finish for specific items, it may be worth bringing in oven cleaning alongside carpet or upholstery work, rather than treating every task as equal. That is usually the cleaner route, no pun intended.
Get a free quote today and see how much you can save.
Conclusion
A strong SW3 end of tenancy cleaning checklist for landlords gives you structure, consistency, and a fairer way to manage checkout day. It helps you separate cleaning from damage, brief contractors properly, and present the property in a condition that is ready for the next tenancy without unnecessary drama. The best checklists are not complicated. They are practical, repeatable, and specific enough to catch the things people usually miss.
In a market like SW3, where standards matter and timing is often tight, that kind of preparation pays off quickly. Keep the process clear, document what you see, and give yourself enough time to do it properly. That alone removes a lot of pressure.
And when the final room is checked, the lights are off, and the property feels calm again, there is a real sense of closure. That part never gets old.
Frequently Asked Questions
What should a landlord include in an end of tenancy cleaning checklist?
A landlord checklist should cover every main room, plus specialist tasks such as ovens, carpets, bathrooms, windows, skirting boards, cupboards, and any furnished items. It should be specific enough to use during inspection, not just a vague reminder to "clean the flat."
Do landlords in SW3 need a professional end of tenancy clean?
Not always, but many properties benefit from one, especially if the home is furnished, heavily used, or needs specialist work. A professional clean is often the easiest way to get a consistent finish before a new tenant moves in.
How is end of tenancy cleaning different from regular domestic cleaning?
End of tenancy cleaning is usually deeper and more detailed. It focuses on empty properties, hidden dirt, and the standard expected at checkout, whereas regular domestic cleaning is more about ongoing upkeep in an occupied home.
Should a landlord clean the property themselves or hire cleaners?
That depends on time, budget, and the property's condition. DIY can work for a light turnover, but professional cleaners are usually better for detailed checks, specialist appliances, or tight turnaround times.
What are the most commonly missed areas during checkout cleaning?
Behind appliances, inside cupboards, extractor fans, top shelves, skirting boards, window tracks, and the backs of doors are often missed. Bathrooms and oven seals are also frequent trouble spots.
Does carpet cleaning matter in an end of tenancy inspection?
Yes, especially if the carpets show traffic marks, spills, pet use, or visible dullness. A proper carpet cleaning check can make a major difference to the final presentation of the property.
How far in advance should a landlord arrange the clean?
Ideally, as soon as the tenancy end date is known and access is confirmed. Leaving it to the last day creates avoidable pressure and makes it harder to fix any missed issues.
What should I do if the property smells clean but still feels stale?
Check hidden areas first: bins, drains, oven seals, soft furnishings, and spaces behind furniture. A fresh-smelling room can still have an underlying source of odour if one area has been missed.
Are landlords allowed to charge tenants for cleaning?
That depends on the tenancy agreement, the property's condition, and whether the cleaning need goes beyond fair wear and tear. Keep clear records, photos, and inventory notes so any deduction is evidence-based and reasonable.
What is the best way to inspect a cleaned property?
Inspect in daylight if you can, and work room by room with your checklist in hand. Check surfaces from eye level, open cupboards, look behind doors, and take photos of anything that still needs attention.
Can a one-off clean replace specialist end of tenancy cleaning?
Sometimes, yes, if the property is lightly used and only needs a reset. But if there are ovens, carpets, upholstery, or deep grime to deal with, a specialist end of tenancy clean is usually the safer option.
Where can I learn more about the company's standards and policies?
If you are comparing providers, it helps to review pages such as about us, insurance and safety, and complaints procedure so you know how the service is run and how issues are handled.